1. 安裝 Texlive
到這裡下載 “install-tl.zip” 檔案,解壓縮後雙擊執行 “install-tl-windows.bat” (執行需要很長一段時間 大概會生出 7 個 GB 大小的檔案)
2. 安裝 VS Code 套件
3. VS Code 環境設定


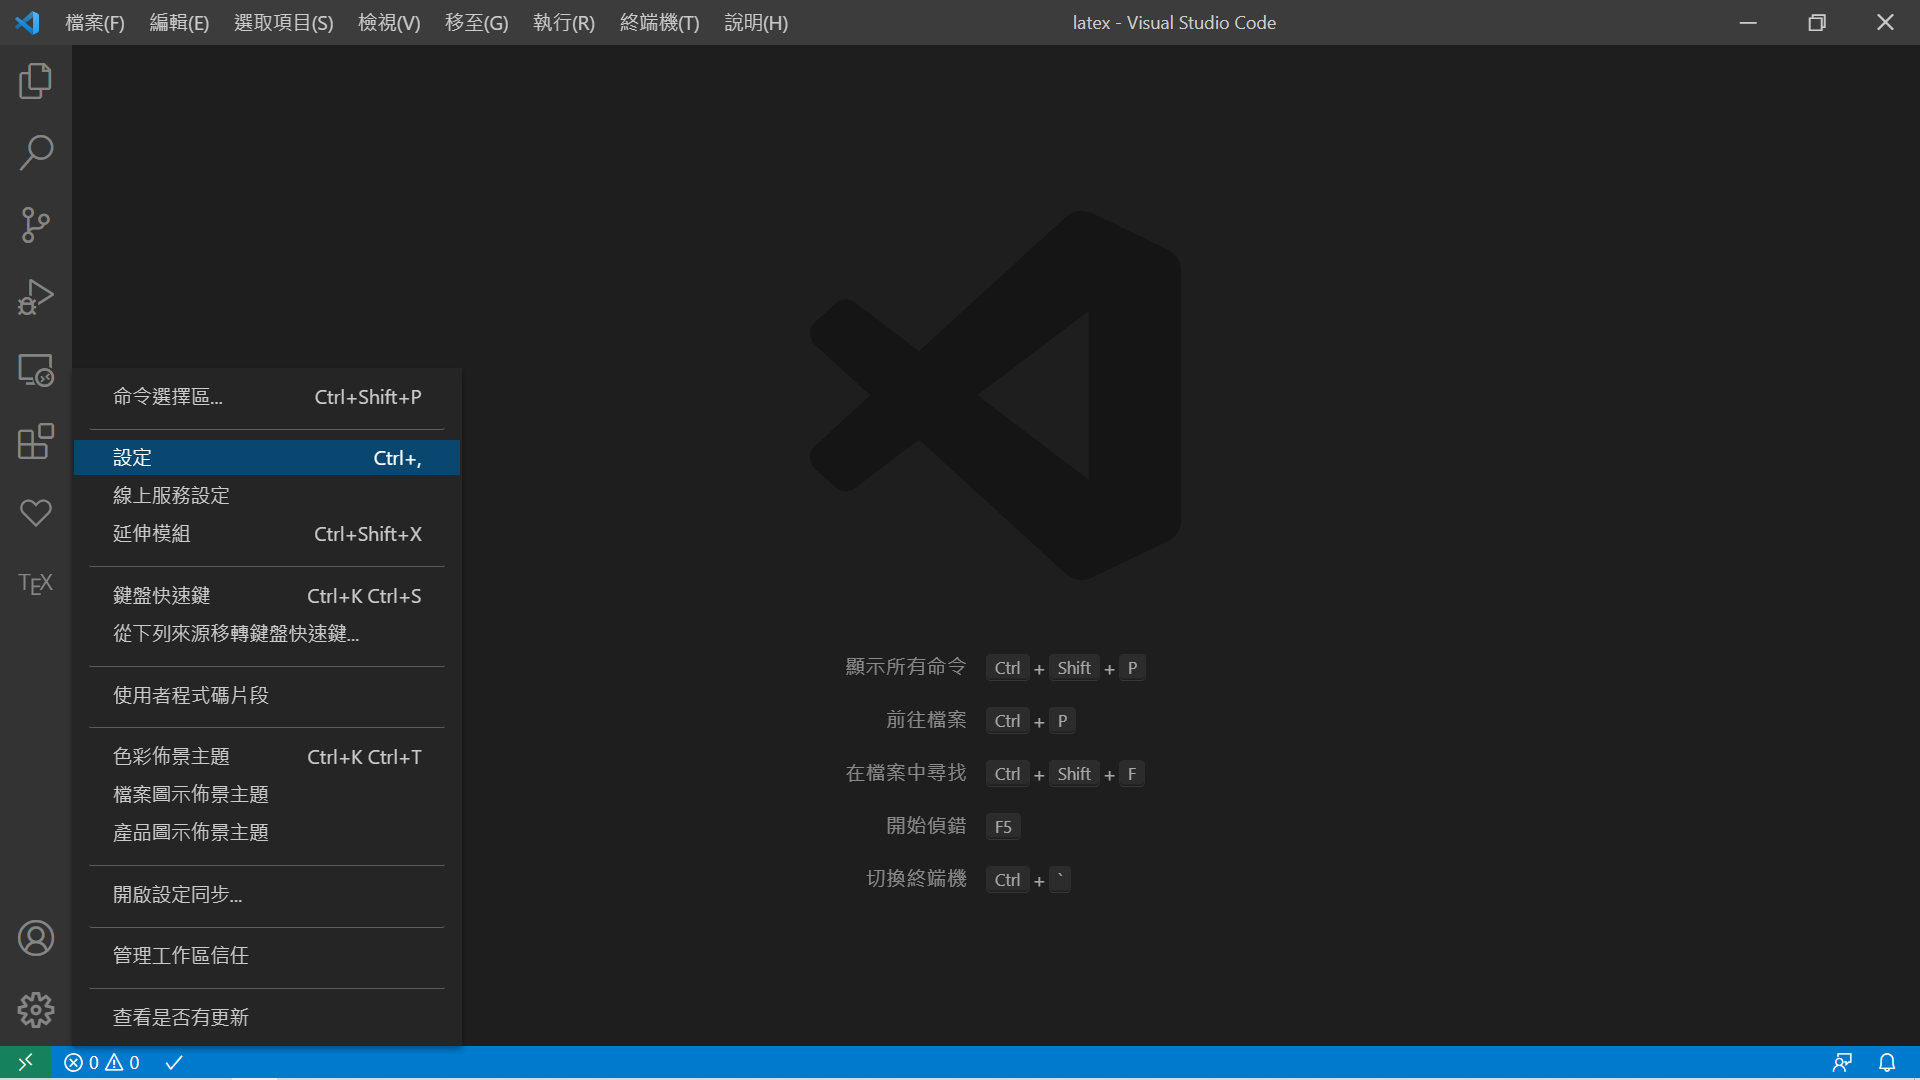
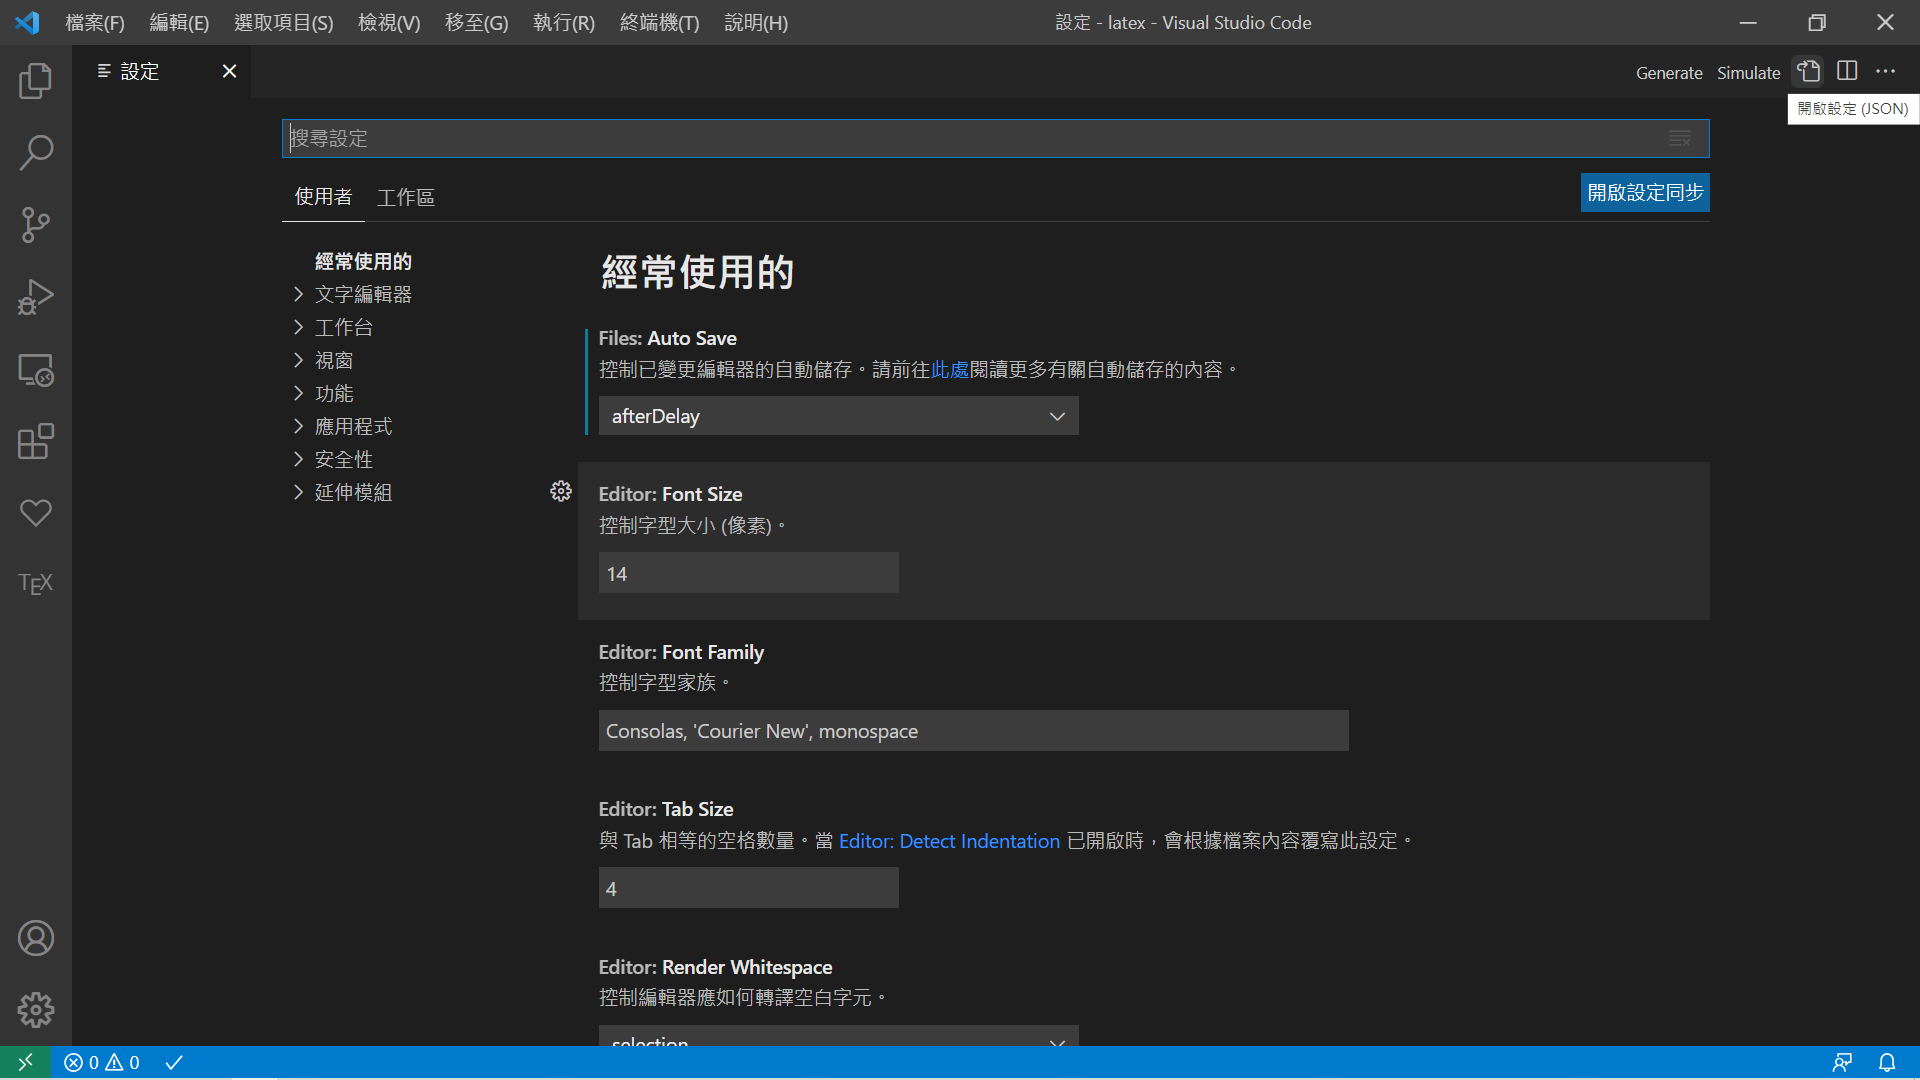
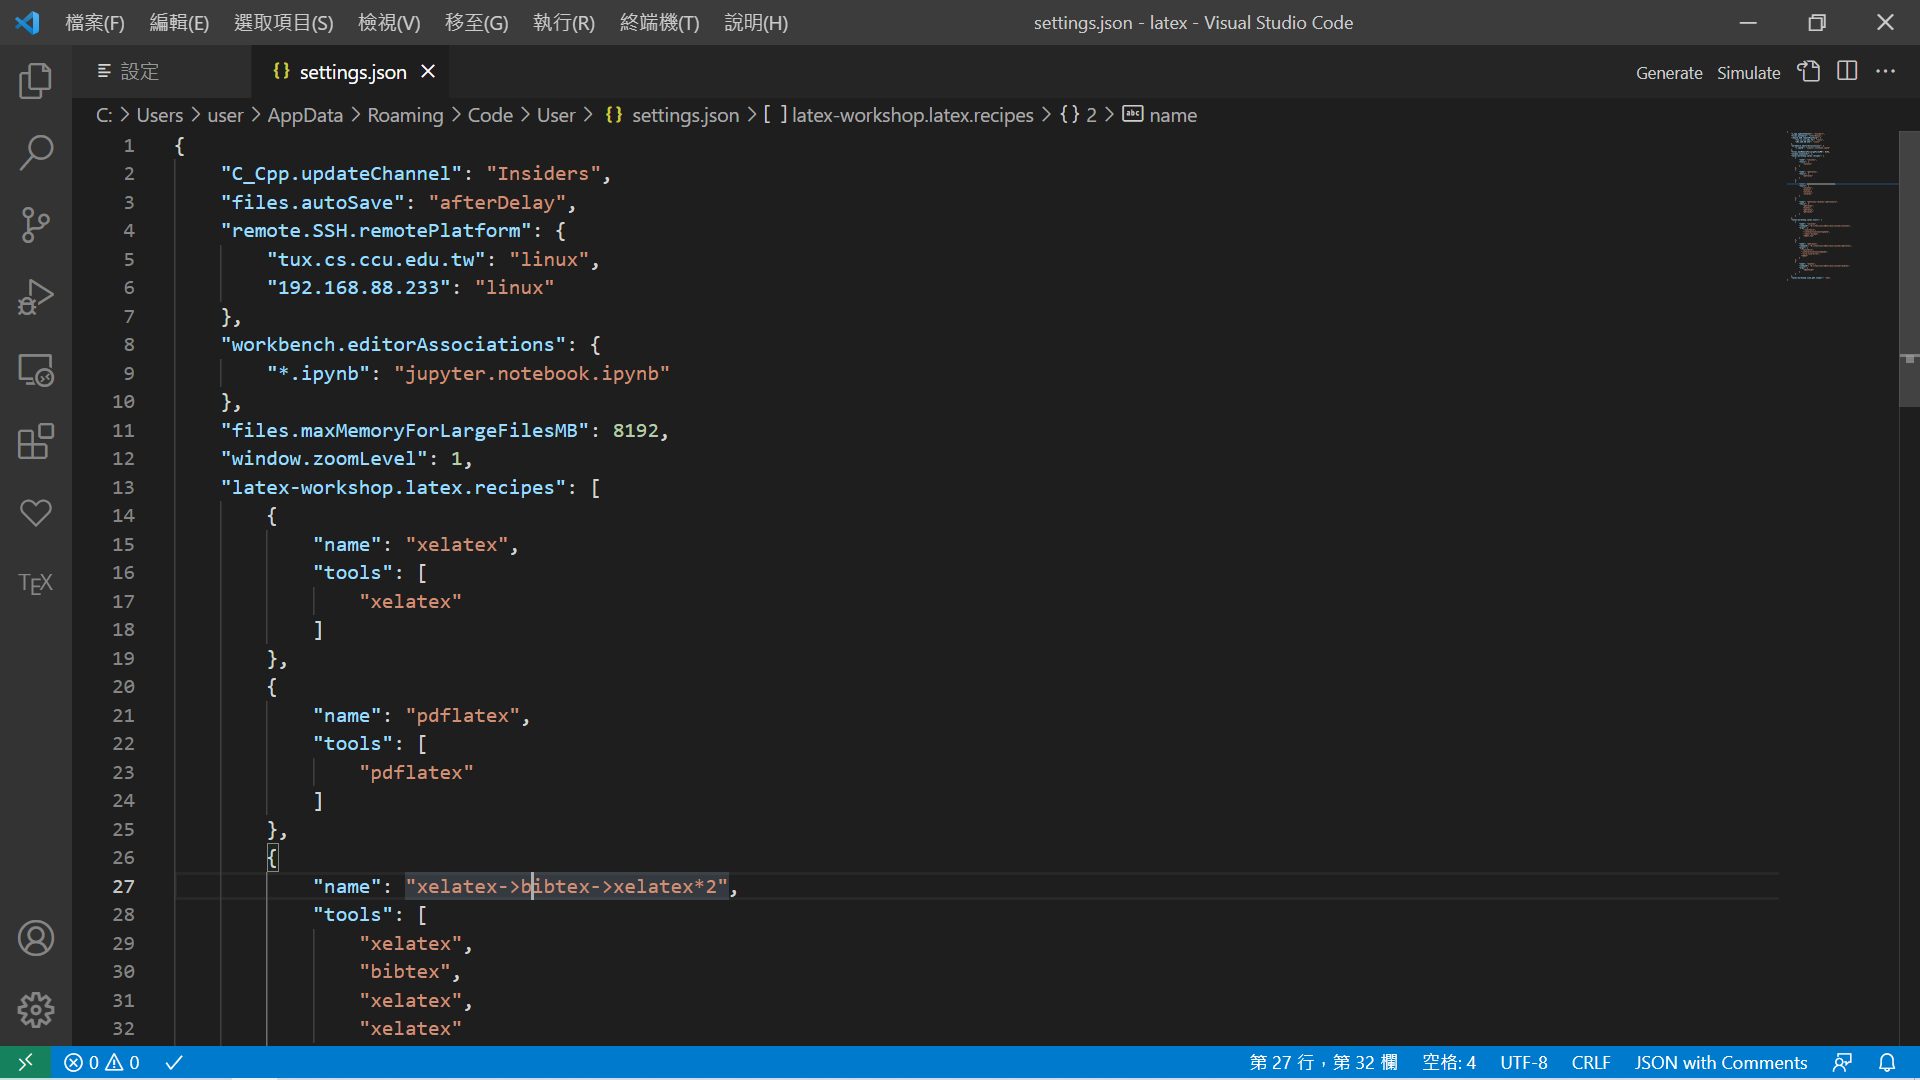
鍵盤按 “CTRL + , " 開啟設定,接著點右上方的 “開啟設定(json)” ,於檔案內新增以下內容
"latex-workshop.latex.recipes": [
    {
        "name": "xelatex",
        "tools": [
            "xelatex"
        ]
    },
    {
        "name": "pdflatex",
        "tools": [
            "pdflatex"
        ]
    },
    {
        "name": "xelatex->bibtex->xelatex*2",
        "tools": [
            "xelatex",
            "bibtex",
            "xelatex",
            "xelatex"
        ]
    },
    {
        "name": "pdflatex->bibtex->pdflatex*2",
        "tools": [
            "pdflatex",
            "bibtex",
            "pdflatex",
            "pdflatex"
        ]
    }
],
"latex-workshop.latex.tools": [
    {
        "name": "xelatex",
        "command": "C:\\texlive\\2018\\bin\\win32\\xelatex",
        "args": [
            "-synctex=1",
            "-interaction=nonstopmode",
            "-shell-escape",
            "%DOC%.tex"
        ]
    },
    {
        "name": "pdflatex",
        "command": "C:\\texlive\\2018\\bin\\win32\\pdflatex",
        "args": [
          "-synctex=1",
          "-interaction=nonstopmode",
          "-file-line-error",
          "%DOC%"
        ]
    },
    {
        "name": "bibtex",
        "command": "C:\\texlive\\2018\\bin\\win32\\bibtex",
        "args": [
            "%DOCFILE%"
        ]
    }
],
4. 使用
新增檔案命名為 “hello.tex” 並且輸入以下內容,接著點右上綠色箭頭建立專案,再按右邊有個放大鏡的圖示以方哥視窗檢視 PDF 檔案
\documentclass{article}
\usepackage{xeCJK}
\begin{document}
Hello World, this is \LaTeX

我是中文字
\end{document}
